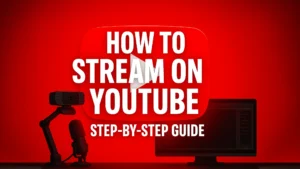
How to Stream on YouTube: The Complete Step-by-Step Guide
Learning how to stream on YouTube is a powerful first step toward building a successful and sustainable content creation career. While Twitch has long been

Learning how to stream on YouTube is a powerful first step toward building a successful and sustainable content creation career. While Twitch has long been the dominant live-streaming platform, YouTube’s unique advantages—primarily its massive discoverability engine and long-term monetization potential—make it an increasingly attractive choice. A live stream on YouTube isn’t just a live event; it’s a permanent video that can be discovered for months or even years.
This guide will walk you through the entire process, from preparing your channel to optimizing your settings in OBS and maximizing your viewership both during and after the broadcast. We’ll show you how to leverage YouTube’s strengths to grow your channel and turn your passion into a business.

Before you go live, you need to set up your channel for success. This phase involves enabling the live streaming feature and preparing your channel to look professional.
You must enable live streaming for your channel, which can take up to 24 hours to become active after you first turn it on. The process has a few simple requirements:
For a full breakdown of the requirements, you can check the official YouTube Help Center.
Unlike Twitch, where you simply go live, YouTube’s best practice is to schedule your stream in advance. This creates a public page for your stream that you can share with your audience to build hype.

OBS Studio is the free, powerful software you’ll use to bring your video, audio, and gameplay together and send it to YouTube.
For even easier setup, you can often log in directly to your YouTube account from this same screen, which will automatically handle the stream key and provide convenient chat and stream management docks.
This is where you build what your audience will see and hear. In OBS, you use “Sources” to add everything to your “Scene” (your layout).
A professional look builds trust and attracts viewers. A YouTube live stream should look just as good as a regular video.
You can easily find and set up a professional stream pack to get the right look from day one. Browse our collections of high-quality designs, and see our guide on the best Twitch overlays which are perfectly compatible with YouTube streaming.

YouTube’s streaming platform is more forgiving with bitrates than Twitch’s, allowing for higher-quality streams. This is a significant advantage, as a high-quality stream can stand out in search.
Go to File > Settings and navigate to the “Output” tab. Set the “Output Mode” to “Advanced.”
| Resolution & FPS | Recommended Bitrate (Kbps) |
| 1080p @ 60fps | 4,500 – 9,000 |
| 1080p @ 30fps | 3,000 – 6,000 |
| 720p @ 60fps | 2,500 – 5,000 |
| 720p @ 30fps | 1,500 – 4,000 |
| 4K @ 60fps | 20,000 – 51,000 |
You can find more detailed information on YouTube’s official streaming settings and recommendations in the YouTube Live Creator Academy.

In your YouTube Studio Live Control Room, you can manage settings that affect your stream’s delay.
This is where YouTube’s unique power comes into play. The live stream is just the beginning.
Once your stream ends, it automatically becomes a VOD (Video on Demand) on your channel. This is YouTube’s biggest advantage over platforms like Twitch, as your VOD can continue to be discovered and watched for years, generating a continuous stream of revenue and new followers.

| Feature | YouTube Live | Twitch |
| Discovery | Highly Discoverable. Live streams are pushed to viewers’ homepages and can rank in search, bringing new viewers in. | Low Discoverability. New streamers are buried at the bottom of a directory, making it hard to grow organically. |
| VODs | Evergreen Content. Streams become permanent videos that can be watched forever, generating continuous views and money. | Temporary Content. VODs are deleted after a set period (usually 60 days for Partners). |
| Monetization | Multiple options (ads, memberships, Super Chat) with higher ad revenue rates. | Multiple options (subs, bits, ads) with generally lower ad revenue rates. Learn more in our guide on how to make money on Twitch. |
| Community | The community is often built through your main channel content, which then converts to live viewers. | Community is built almost exclusively through live interaction. |
For a full breakdown of the two platforms and how to use them together, read our guide on how to stream on Twitch with OBS.
You’ve now learned the complete process of how to stream on YouTube. The technical setup with OBS is just the beginning. The real secret to success lies in understanding and leveraging YouTube’s core strengths: its discoverability engine and its long-term, evergreen video format.
By creating high-quality, professional-looking live streams and optimizing them for discoverability after the broadcast, you can build a channel that not only succeeds in the moment but continues to grow for years to come.
Your next steps are to:
Learning how to stream on YouTube is a powerful first step toward building a successful and sustainable content creation career. While Twitch has long been
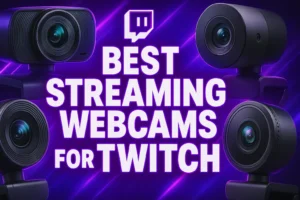
A webcam is more than just a camera; it’s your face and personality, the primary way you connect with your audience. Choosing the best streaming
Stream Skins is a Design Company focused on improving your stream.
Do you want to evolve your stream?
Premium Stream Overlays, Starting Soon, BRB, Stream Ending, Facecams, Transitions, Twitch Banners & Panels. Check out our Stream Shop.