If you want your model to shine and your brand to feel consistent from Starting Soon to Just Chatting, you need more than random graphics—you need VTuber overlay packs that are cohesive, easy to install, and gentle on performance. This mega guide goes deep into selection, setup, performance, accessibility, vertical streaming, and pro-level customization. It’s written to help real buyers pick the right VTuber overlay packs and get them running in minutes without FPS drops, janky transitions, or unreadable chat.
What’s inside modern VTuber overlay packs (and why it matters)
A serious pack is a visual system, not a folder of PNGs. Most VTuber overlay packs worth buying include:
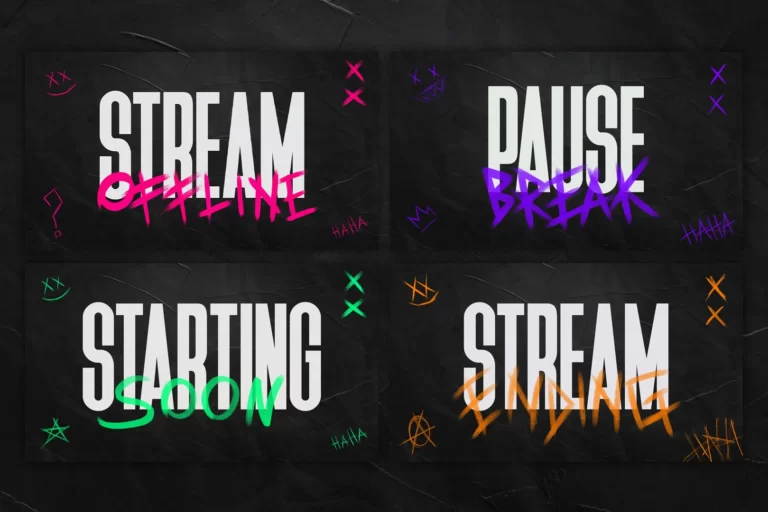
Animated scenes: Starting Soon, Be Right Back, Stream Ending, and often Intermission or Countdown (short, seamless loops).
Webcam & model frames: multiple shapes/ratios (16:9, square), with padding that complements Live2D or PNGTuber compositions.
Transitions: a stinger transition (ideally 60fps) timed around 300–600 ms for clean scene switches.
Formats that perform: WebM with alpha for animations (true transparency, smaller footprint), PNG for static elements, optional PSD/AE for edits.
Documentation & scene collections: importable profiles/collections for OBS and Streamlabs that reduce setup from half an hour to a few minutes.
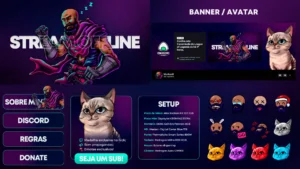
Branding assets: backgrounds, accent shapes, colorways, and typography specs that keep your vibe consistent on panels, alerts, and thumbnails.
The big win: coherence. When your stinger echoes the same shapes/colors from your Starting Soon scene, when alerts and panels match your chat frame, your stream stops feeling “assembled” and starts feeling like a brand.
Top-Rated VTuber Overlay Packs for OBS & Streamlabs 2025 6
Quick picks: styles that VTubers actually use (with immediate links)
Want to explore styles now and come back to the guide? Start here—then use this article to refine choices and optimize setup.
Sakura / Pastel VTuber vibe – soft colorways, rounded shapes, perfect for cozy streams and art. Pair with: Sakura Stream Pack and Rainbow Stream Pack.
Bold / Color-rich anime vibes – saturated color blocks and energetic accents that pop on camera. Try: Prismatic Stream Pack and RGB Stream Pack.
Stylized Japan core – minimalist type, clean grids, and subtle textures. See: Nippon Stream Pack.
Glitch / Tech / HUD – high-energy motion for action streams (use motion discipline). Explore: Glitch Stream Pack or the site Shop.
How to choose VTuber overlay packs (a buyer’s framework)
1) Performance first
Animations: prefer WebM with alpha over MP4+chroma. You get true transparency, better quality, and smaller files.
Stinger length: 0.4–0.9 s, transition point around 300–600 ms (you’ll fine-tune in OBS).
Looping FPS: 30fps is fine for subtle background loops; 60fps is ideal for stingers or snappy accents.
Weight discipline: keep only a few animated sources per scene. If everything moves, nothing stands out—and CPU/GPU suffer.
2) Readability for chat-centric streams
VTubers talk—a lot. Your chat should be easy to read on mobile: larger line height, strong contrast (dark plate behind white text), predictable scroll area.
Use lower-thirds that don’t crush your model or cover subtitles.
3) Model-aware composition
Padding: give your model space to emote. Frames should not crop hair, accessories, or reactive pupils.
Eye path: guide attention from model → chat → content. Use size/contrast to enforce that order.
Quiet backgrounds: gentle motion behind your model; save punchy motion for transitions and callouts.
4) Brand flexibility
Multiple colorways or easy recolor (Hue/Saturation in OBS) extends the pack’s life.
Editable sources (PSD/AE) are gold for holiday recolors, collab specials, and seasonal events.
5) Full ecosystem
Good VTuber overlay packs ship with coordinated panels and alert graphics, so your About/Donate/Socials match on profile pages—and so alerts don’t feel bolt-on.
Top-Rated VTuber Overlay Packs for OBS & Streamlabs 2025 7
OBS setup for VTubers (fast, reliable, no-nonsense)
Below is a battle-tested flow that works whether you’re Live2D in VTube Studio or a PNGTuber with reactive images.
Subtitles: if you use live captions, reserve a safe area so text isn’t blocked by lower-thirds or emotes.
Screen readers (VOD captions): keep text overlays short and consistent to help automated captioning.
Vertical streaming (9:16) without rebuilding everything
Profile: create a 1080×1920 profile in OBS/Streamlabs.
Reframe: keep your model larger and reposition chat to the top/bottom; gameplay is usually center-cropped for mobile.
Assets: many VTuber overlay packs include 9:16 variants; if not, repurpose plates and frames and adjust spacing.
Performance: 30fps often suffices for chat-heavy vertical; go 60fps for fast gaming.
Customization without After Effects (fast wins)
Hue/Saturation filter in OBS: nudging hue can match seasonal palettes without re-exporting everything.
Tint overlays: stack a color rectangle under semi-transparent PNGs to recolor glows subtly.
Replace only the background: keep overlay elements static; swap the background loop to theme special events.
Lower third template: one reusable lower third for names/segments instantly adds “show flow” without extra clutter.
Scene architecture that scales with your content
Global Overlay Scene: put your webcam frame, nameplate, and persistent stickers in a separate scene; add it as a Source in every main scene. Edit once, update everywhere.
Collections for event types: collabs, karaoke, drawing streams—each can have its own scene collection while reusing the same assets.
Profiles by platform: Twitch/YouTube/Kick each with output/buffer tailored; same VTuber overlay packs, optimized pipelines.
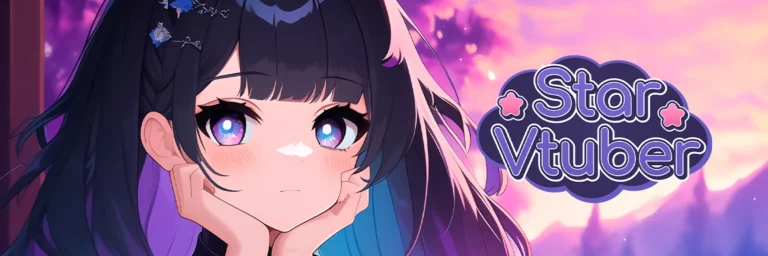
Matching overlays to your VTuber model (brand chemistry)
A model with starry eyes, metallic accents, or gothic lace pairs best with overlays echoing those motifs:
Top-Rated VTuber Overlay Packs for OBS & Streamlabs 2025 9
Troubleshooting: real problems, fast fixes
Black boxes around animations
You’re using MP4 or a WebM without alpha. Replace with WebM (alpha). In OBS/Streamlabs, add as Media Source, enable Hardware Decoding.
Stinger feels laggy
Shorten the file or reduce resolution. Set the transition point closer to the moment your wipe covers the screen (try 450–520 ms).
Chat is unreadable
Add a 50–70% dark plate behind chat, increase line height, and raise font size. If necessary, blur the area under chat.
Alerts don’t match the overlay
If your pack ships alert graphics, import them into your alert service, match colors and durations. Avoid alert themes that clash with your VTuber overlay packs.
Fonts look wrong
Install provided fonts before opening scenes; then refresh text sources.
Dropped frames on scene switch
Your stinger or background loops are too heavy. Use smaller WebM files, limit animated sources, and verify Hardware Decoding.
Weird color banding
Add subtle noise/dither over large gradients. It hides banding after streaming compression.
Buying checklist (print this before you pay)
Animated Starting/BRB/Ending scenes (short loops)
Stinger 60fps with transition point guidance
WebM with alpha for animations; PNG for statics
OBS & Streamlabs support; scene collection or quick guide
Readable chat area (contrast + spacing)
Multiple colorways or easy recolor in OBS
License for streaming/monetized VODs
Optional 9:16 variants for vertical live
Coordinated alerts & panels
Fonts included and documented
If a product page checks these boxes, you’re looking at VTuber overlay packs that are worth your time and money.
Top-Rated VTuber Overlay Packs for OBS & Streamlabs 2025 10
FAQ: VTuber overlay packs
What’s the difference between generic stream overlays and VTuber overlay packs? VTuber-oriented packs account for model padding, face/eye placement, and chat prominence. They include frames and plates that protect your model silhouette and leave space for emote-heavy chat, while generic packs often prioritize gameplay first.
Do I need a stinger transition? Not mandatory—but a short 60fps stinger timed around 300–600 ms makes scene changes feel premium and keeps energy consistent with your brand.
Will these run on a mid-range PC? Yes—if you choose WebM with alpha, keep animated sources per scene under control, and enable Hardware Decoding in OBS/Streamlabs.
Can I recolor without After Effects? Often yes. Use OBS Color Correction/Hue Shift, or pick packs that ship multiple colorways. For deeper edits, PSD/AE sources help.
What resolution and FPS should I stream? 1080p is the sweet spot for most VTubers; 60fps if you game, 30fps is fine for art/chat. Keep heavy loops at 1080p to save resources.
I also stream vertical. Do I need separate overlays? Some VTuber overlay packs include 9:16 variants. If not, you can repurpose plates and frames—just re-space elements for mobile readability.
Are these packs licensed for monetized streams? Quality packs include a streaming/VOD license. Read the license file; keep it in your /Docs folder.
Final thoughts (and your 10-minute plan)
The best VTuber overlay packs are built for reality: animated scenes that won’t tank performance, a stinger that hides the cut instead of stealing the moment, readable chat for long community segments, and assets that understand a Live2D model’s space. Pick the style that matches your character and content, install in minutes, then spend your time streaming—not tweaking.
10-minute plan:
Choose a style (Sakura/Pastel, Bold/Anime, Glitch/HUD, Minimal/Japan-core).
Verify the buying checklist (WebM with alpha, 60fps stinger, OBS/Streamlabs support).
Import scenes, set stinger around 450 ms, and test.