How to Set Up Stream Alerts in Streamelements
You’ve just gone live. A new viewer, intrigued by your title, clicks on your stream. The first thing they do? They follow, waiting to see

So, you want to become a VTuber? With the recent rise in popularity of virtual YouTubers (or “VTubers”), it’s no wonder that more and more people are interested in joining the fun!
If you’re unfamiliar with VTubers, they are essentially Streamers/YouTubers who use avatars instead of their real faces in their videos.
While the concept might seem daunting at first, creating your own VTuber avatar is pretty simple… as long as you have the right tools.
In this blog post, we’ll walk you through everything you need to know to get started.

This is the most important part of the process, as it will define your look and personality.
Before starting with Design and Illustration, you must create a VTuber Character Sheet. This will help you to develop a unique design that suits you.
For that, we will leave the best video explaining Character Sheet so that you can create yours and continue in this tutorial for the design and illustration.
Once you’ve defined your VTuber design, you have 2 options:
Each option has its pros and cons. Hiring an artist is great for a more professional VTuber and saves you the trouble of illustrating and separating the parts. However, it can be a little expensive as the average price of illustration + rigging is $350.
Creating it yourself is free, but it’s not easy to make a good illustration, separate everything and animate all the parts, thinking about the physics and smoothness of the movements.
In case you are undecided between the two options, Stream Skins offers some ready-made Vtubers with complete packages, including model + all overlays for your stream, so it is a good option for those who do not have a high budget or do not have artistic skills.

If you decide to pay an artist to make your model, here is the link to choose your artist.
If you choose to make the model yourself, continue in this tutorial that we will go through step by step.
Now it’s time to bring your VTuber to life. To illustrate your model, you can use any software that allows illustration, such as Adobe Photoshop, Gimp, and Clip Paint Studio.
We recommend using a drawing tablet to be more precise and easier when illustrating.
In this tutorial, we will use Clip Studio Paint as it is easier and more complete to create your art. Watch the video below to learn more about drawing and separating your model:
Now with the model ready and separated, we set out to animate (rig) your Vtuber.
Rigging is an animation technique that adds movement to the character by building a series of “bones”, simulating the structure of a real human body. But do not worry that the rig doesn’t have to be complex for the motion capture VTuber software.
To rig your model you need a software like Live2D Cubism that allows you to add these structures and control the character’s movement.
To make it simpler, we leave this video teaching you how to rig your model:
When your rig is ready, the software used to “control” your model is Vtube Studio, a free app found on Steam.
To import an avatar in Vtube Studio, click on the first icon and select “import model”.

Create a folder containing your Live2D model in the following folder:
\Steam\steamapps\common\VTube Studio\VTube Studio_Data\StreamingAssets\Live2DModels

After you put the file in the correct folder, close VTube Studio and open it again, as soon as you click on the models, you will notice your new Vtuber model included in the list.
To move your avatar, use the left click of your mouse and resize using the scroll wheel.
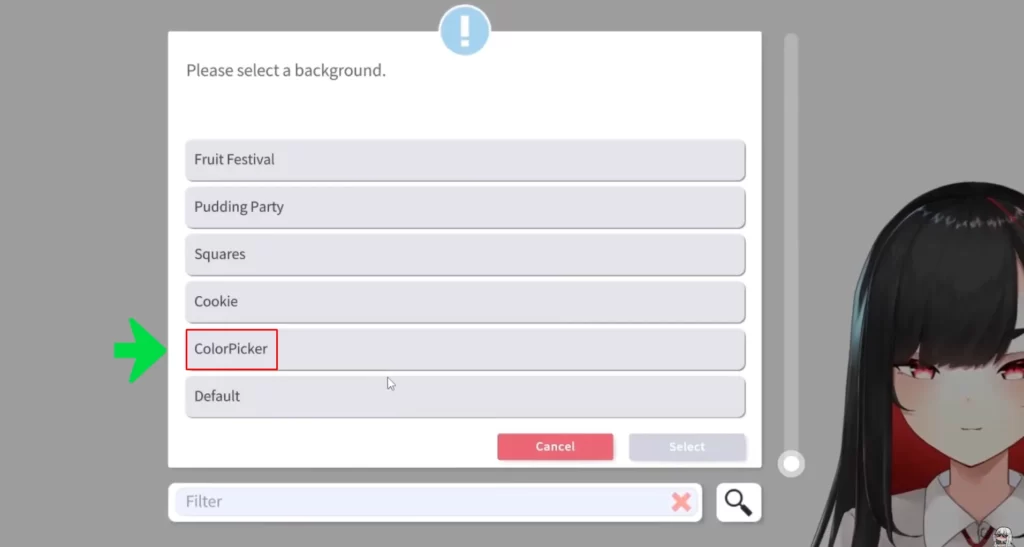
To make your background invisible and be able to stream on OBS, click on the second green icon in the option “backgrounds” and select the “Color Picker.” Turn on the option “transparent on capture”.

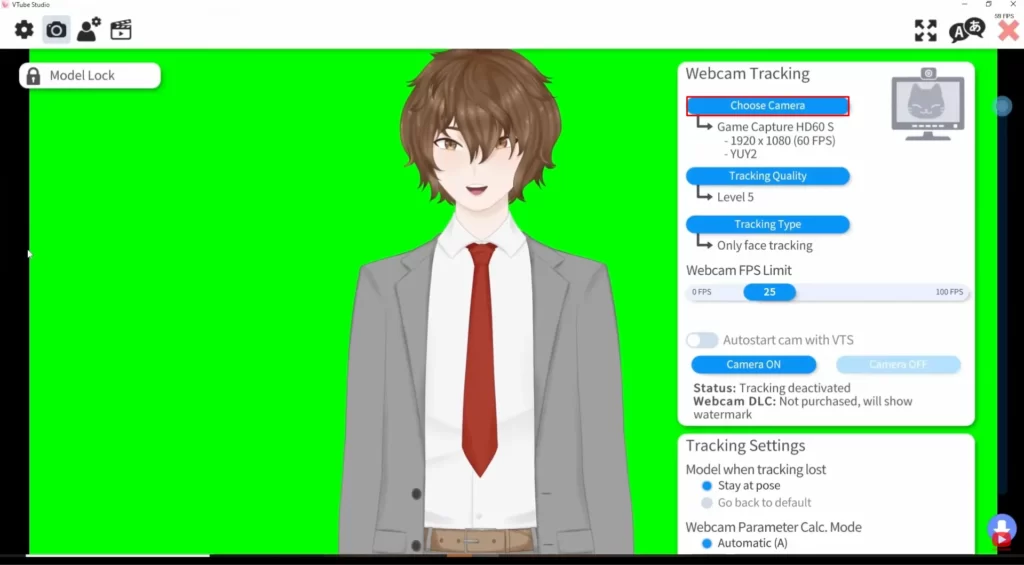
To enable your camera click on the gear icon, choose the option “Choose camera,” find your webcam and resolution and choose the number of frames you want (the more, the better, but it requires more from your PC).
Finally, choose the color format “YUY2” and that’s it!
You can change the tracking quality, but “Level 5” will be fine for most. If your PC is not very good, you can lower the quality level or try the RTX option (which requires an RTX graphics card).

Something that can make your life easier is to check the “Autostart cam with VTS” option so that you don’t have to open these settings every time you open the program.
All the other options we leave in default, but you can customize it the way you prefer.
Now that you have your avatar, it’s time to set up your broadcasting software.
For this, we recommend using OBS Studio, a free and open-source program popular among streamers and YouTubers.
Once you’ve downloaded and installed OBS Studio, open it up and head to the “Scene” tab. You’ll need to add a “Game Capture” source for Vtube Studio.
To make it transparent in OBS, select the “Allow Transparency” option when importing a new scene. (Ensure you enabled this option in Vtube Studio in the previous step.)

Vtube Studio – Steam Version:
Copy the folder and paste it into
\Steam\steamapps\common\VTube Studio\VTube Studio_Data\StreamingAssets\Live2DModels
Facerig:
Copy the folder and paste it into
\Steam\steamapps\common\FaceRig\Mod\VP\PC_Common\Objects
Prprlive:
Open Prprlive and load the character, go to the folder, and select .model3.json After that, it will show your character on the list 🙂
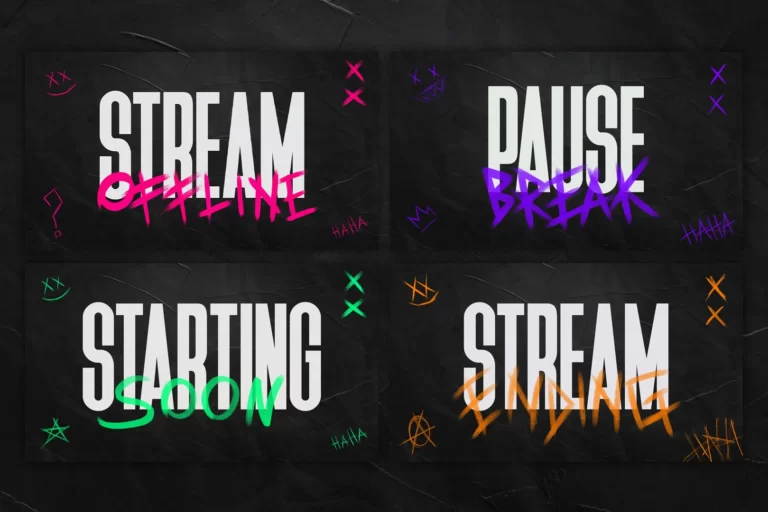
Now that you have your VTuber Model ready and configured, you can complement your Twitch and OBS with scenes like Starting Soon, BRB, Stream Ending, Twitch Banners, and Panels.
This will help to increase engagement and stand out from the crowd improving the look of your stream. With that in mind, Stream Skins presents you Stream Packages, complete packages with the essentials to boost your content creation. Check out our stream shop!

In conclusion, creating a VTuber avatar requires skills in 2D or 3D illustration and rigging, as well as the use of various software like Vroid Studio. It also involves promoting your VTuber to build an audience. With dedication and hard work, anyone can create a successful VTuber.

You’ve just gone live. A new viewer, intrigued by your title, clicks on your stream. The first thing they do? They follow, waiting to see

You’ve just gone live. A new viewer, intrigued by your title, clicks on your stream. The first thing they do? They follow, waiting for that
Stream Skins is a Design Company focused on improving your stream.

Do you want to evolve your stream?
Premium Stream Overlays, Starting Soon, BRB, Stream Ending, Facecams, Transitions, Twitch Banners & Panels. Check out our Stream Shop.