
The step-by-step Vtuber Modeling Ultimate Guide
The world of VTubers is an exciting blend of technology, creativity, and online culture. Central to a VTuber’s identity is their virtual avatar, which represents
The world of VTubers is an exciting blend of technology, creativity, and online culture. Central to a VTuber’s identity is their virtual avatar, which represents them in the digital space.
This blog post will dive into the intricate process of VTuber modeling, detailing the stages, tools, and skills required to bring a virtual character to life.
1. The Conceptualization Stage: Before diving into VTuber modeling, we need to define all aspects and design of our project. This involves:

2. Choosing the Right Tools: After creating the concept of our VTuber, it’s time to put it into practice, the digital modeling world is rich with software. Some of the prominent ones used for VTuber creation include:
The choice of this software will depend on the style of the model, for VTuber 2D models we recommend Clip Studio Paint or Adobe Photoshop.
Clip Studio Paint: Clip Studio Paint (formerly known as Manga Studio) is a digital art software designed for drawing and painting.

Popular among comic book artists and illustrators, it provides a wide range of tools tailored for creating manga, comics, and digital art.
It boasts a natural brush feel, vector capabilities, and advanced features for creating comic panels, inking, coloring, and text effects.
Adobe Photoshop: Photoshop is a widely used graphic editing software, and it’s considered the industry standard for digital art, photography, and graphic design.

It offers advanced photo manipulation capabilities, raster graphics editing, text tools, and an extensive set of brushes and effects.
Photoshop is known for its versatility, allowing users to create and enhance images, design web graphics, and even produce short animations.
For 3D VTuber Models, we recommend VRoid Studio or Blender.
VRoid Studio: VRoid Studio is a free software that allows users to create 3D characters with an anime-inspired aesthetic.

Aimed at both amateur and professional creators, it offers intuitive tools for designing unique 3D character models.
These characters can then be used in various VR/AR platforms, games, and other animations.
Blender: Blender is a powerful, open-source 3D computer graphics software used for creating animated films, visual effects, 3D printed models, interactive applications, and video games.

It provides a comprehensive suite of tools for modeling, rigging, animation, simulation, rendering, compositing, and even video editing.
Due to its versatility and zero cost, Blender has garnered a large and active community of users.
For this example, we will use Adobe Photoshop but it can be done the same way in Clip Studio Paint:
1. Use the moodboard and previously made sketches to design your final VTuber model.
2. Remember to draw part by part of the body and pay attention to the details because after the model is rigid, everything will appear in the final animation.
3. It is also necessary to separate all the parts into layers as in the photo below, so that we can create the skeleton when rigging the model.

Remember to do your best and add all the details at this stage as it is already the result of the final VTuber model.
2D VTuber rigging is distinct from 3D rigging. While 3D rigging often involves skeletons and mesh deformation, 2D rigging is more about transforming and deforming flat images to give the illusion of movement and depth. One of the most popular software choices for 2D VTuber rigging is Live2D Cubism.
Here’s a basic guide on 2D VTuber rigging using Live2D:
1. Prepare Your Artwork:

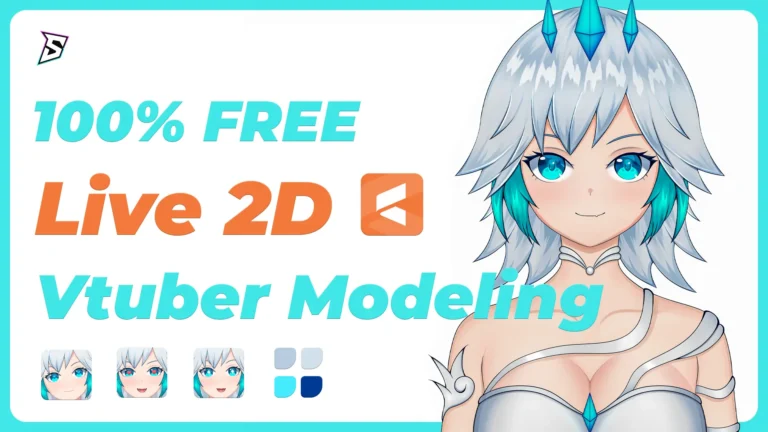
Premium Ice Queen VTuber Model
2. Import into Live2D:
3. Create a Mesh:
4. Rigging:
5. Parameters and Motion:
6. Physics:

7. Test and Refine:
8. Integrate with Face Tracking Software:
9. Stream or Record:

Remember, while the initial rigging process can be intricate and time-consuming, the results can be exceptionally rewarding. Moreover, the more you practice and refine your skills, the more lifelike and expressive your 2D VTuber avatar can become.
If your VTuber model is in 3D, the process for modeling and rigging is completely different, once the design and concept are set, the actual 3D modeling begins.
For detailed modeling or unique designs, tools like Blender, Maya, or ZBrush may be required. These tools offer more flexibility but also come with steeper learning curves.

3d vtuber modeling
Rigging is a crucial step in the VTuber creation process. It involves adding a skeleton or structure to a 3D or 2D model, allowing it to move and animate in a way that mimics natural movement. For VTubers, this ensures their digital persona can replicate their real-life movements, from subtle facial expressions to full-body gestures.
Here’s a step-by-step guide to the VTuber rigging process:
1. Understand the Basics:
2. Setting up a Skeleton:

3. Skinning the Model:
4. Facial Rigging:

5. Testing:
6. Integrate with Motion Capture:
Many VTubers use motion capture technology to translate their real-life movements to their virtual avatar. Once rigged, your model can be integrated into software like FaceRig, Luppet, or 3tene, which will use the rig to animate based on your movements.
7. Iterate and Refine:
Rigging is often a process of refinement. As you test and animate, you might find areas that need adjustment. Go back and tweak as necessary.
Remember, while the above guide provides a general overview, the specifics can vary based on the software you’re using. Most popular 3D modeling tools (like Blender, Maya, or VRoid Studio) offer detailed tutorials and documentation on rigging. If you’re new to rigging, it’s beneficial to start with beginner tutorials to understand the basics before diving into the complexities of VTuber-specific rigging.
Creating expressive VTuber models is key to establishing a connection with the audience. While some VTuber models use a combination of bones and blend shapes to create facial expressions, others rely more heavily on blend shapes or morph targets. Here’s a step-by-step guide to creating expressions for a VTuber model:
1. Start with a Neutral Face:
Before you begin creating expressions, ensure you have a base or neutral face. This is the default state from which all other expressions will be derived.
2. Understand Blend Shapes/Morph Targets:

3. Create Basic Expressions:
Begin by making fundamental expressions that can be combined to create more nuanced emotions:
4. Lip Sync Shapes:
For speech, create shapes for different phonetic positions:
5. Test the Expressions:

6. Integrate with Facial Capture Software:
7. Fine-tune and Refine:
8. Advanced Expressions:
As you become more experienced, consider creating nuanced expressions:

9. Continuous Improvement:
Remember that the key to a successful VTuber model lies not only in its design but also in its expressiveness. The more relatable and dynamic your VTuber’s expressions are, the more engaging your content will be for your audience.
Testing and Iteration: Before debuting, it’s essential to test the VTuber model rigorously.
If you want to take your VTuber project to another level, you can also collaborate with other professional artists to refine and adjust your model, so you can reach a high-quality level with the help of professionals with years of experience.
If you want a professional VTuber model without having to pay a lot for a professional and wait months for the result, Stream Skins has Premium VTuber Models with ultra quality, smooth animations and a complete stream package in the same theme as VTuber, see our store and find the perfect model for your stream 🙂
The world of VTubers is an exciting blend of technology, creativity, and online culture. Central to a VTuber’s identity is their virtual avatar, which represents
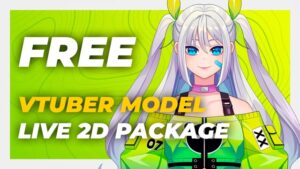
Looking for a free VTuber model that’s fully rigged, stylish, and stream-ready? You’ve found it. This professionally designed Live2D model is free for personal use
Stream Skins is a Design Company focused on improving your stream.
Do you want to evolve your stream?
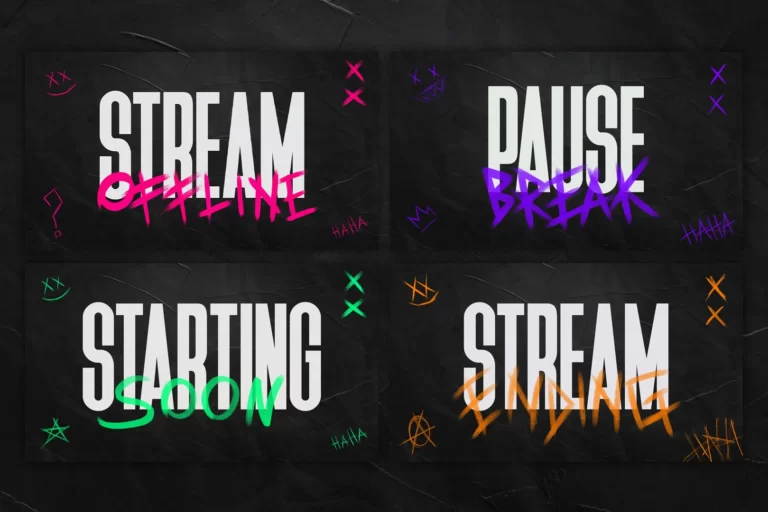
Premium Stream Overlays, Starting Soon, BRB, Stream Ending, Facecams, Transitions, Twitch Banners & Panels. Check out our Stream Shop.