
How to Stream on YouTube: The Complete Step-by-Step Guide
Learning how to stream on YouTube is a powerful first step toward building a successful and sustainable content creation career. While Twitch has long been

At Stream Skins we help you configure each element of the Stream Pack, this time we will teach you how to configure the Chat Box correctly.
1. Add a new source in the scene where you want the chat.
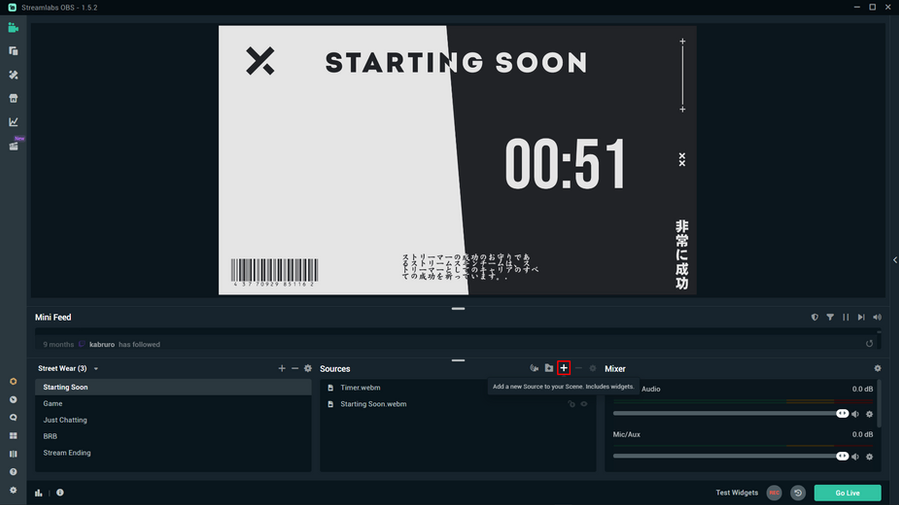
2. Choose Chatbox and click add source.
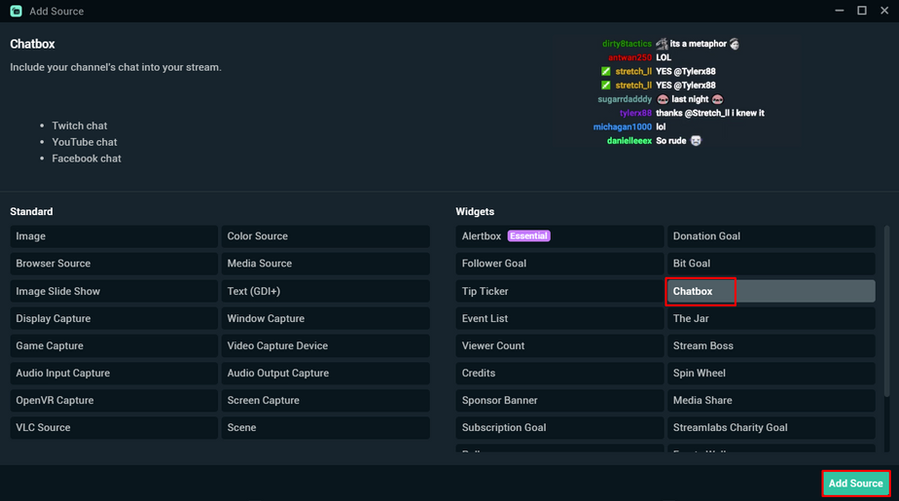
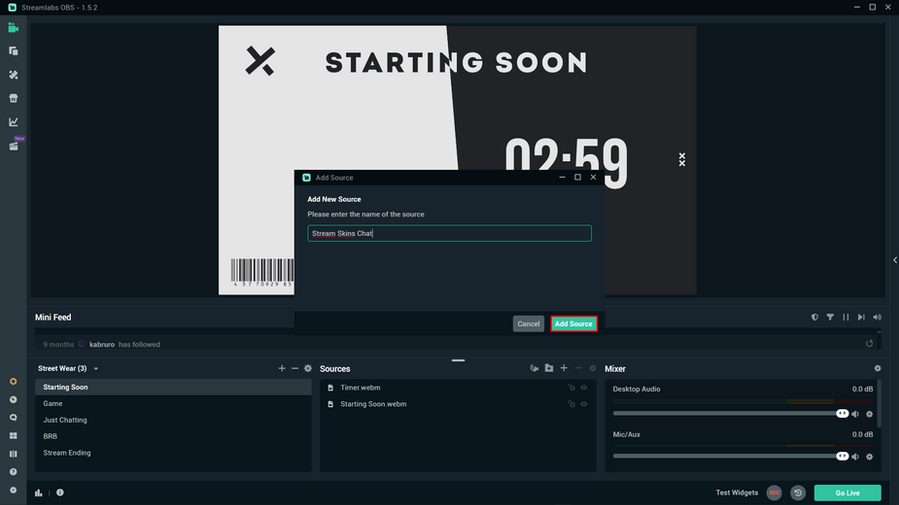
3. Name the font as you like and click add source.
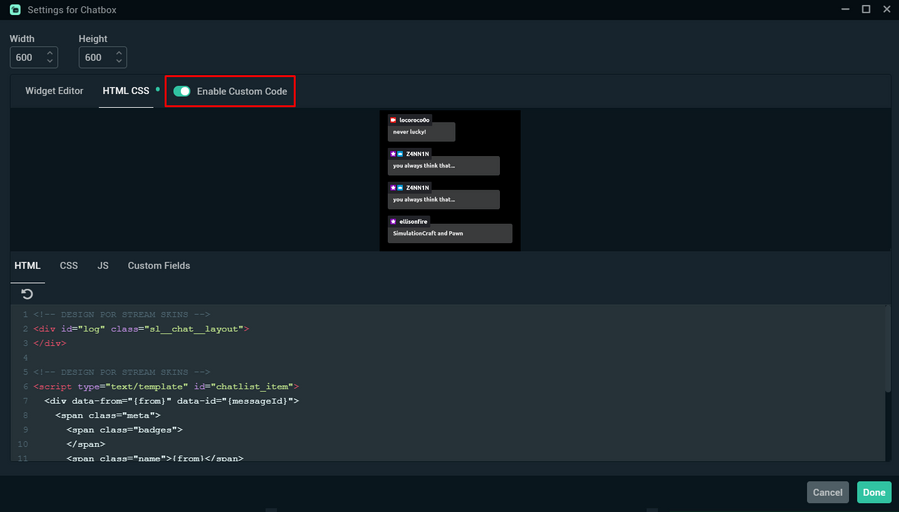
4. With Settings open, click on “HTML CSS”.
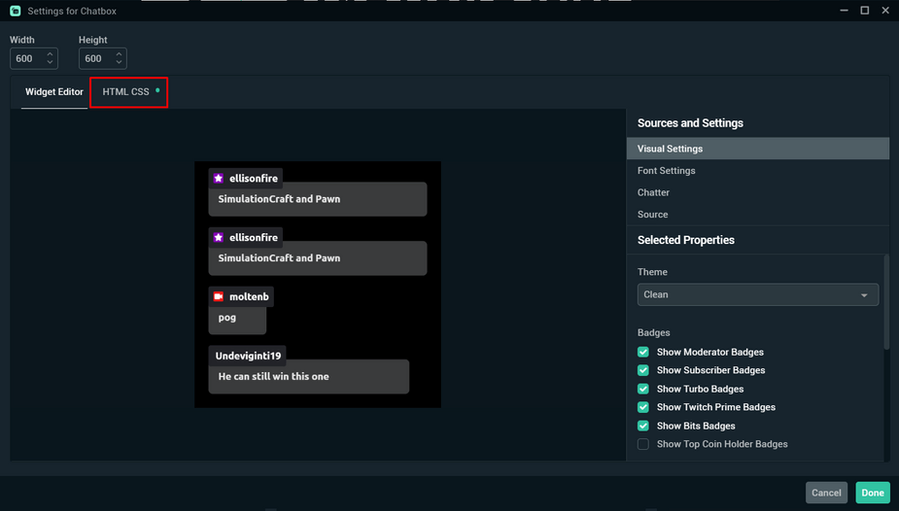
5. Select the “Enable Custom Code” option.
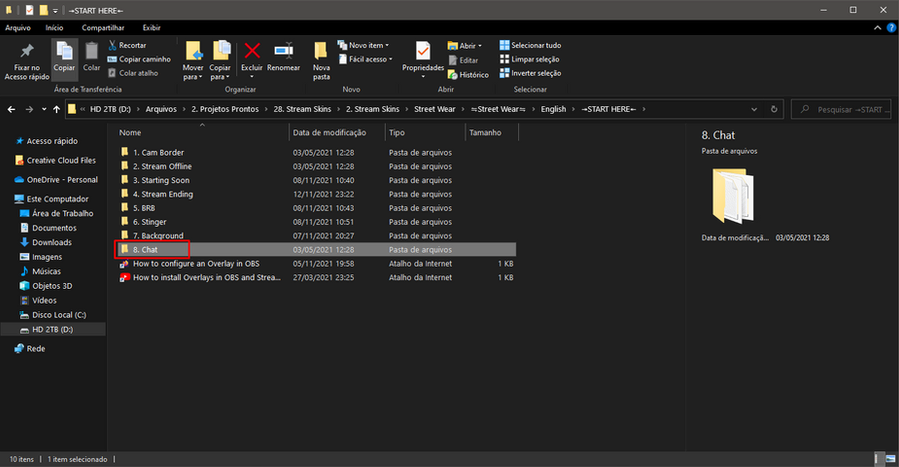
6. Open the Stream Pack folder and look for the Chat.
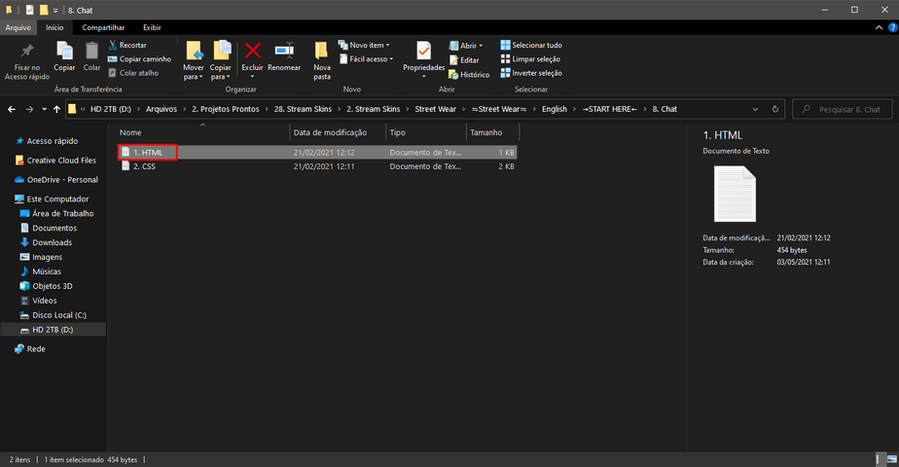
7. Select the HTML file and copy all the content inside.
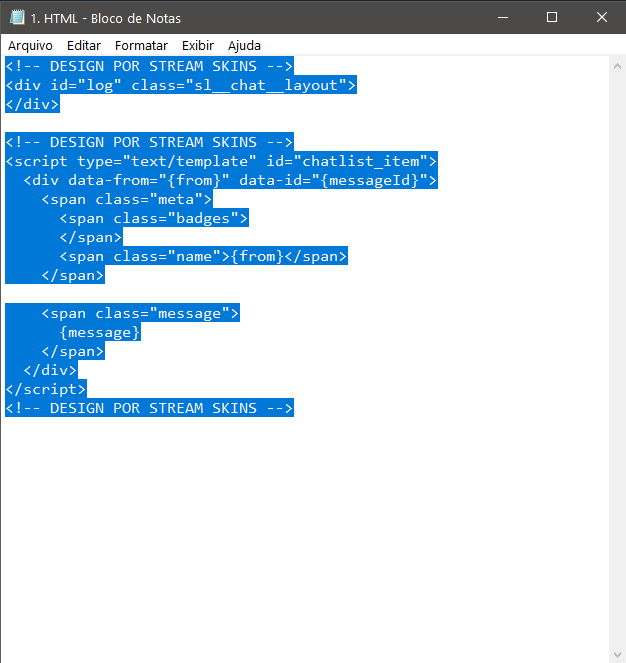
8. Delete the original text and paste in the HTML you just copied.
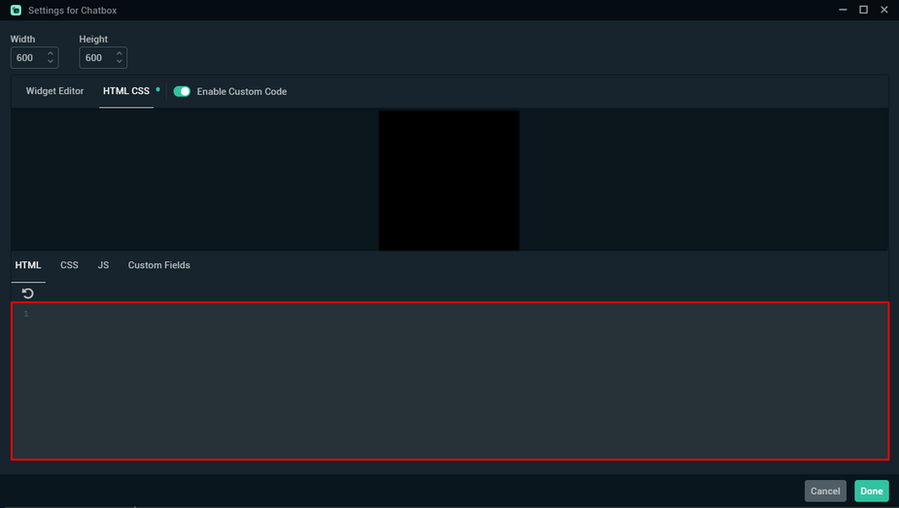
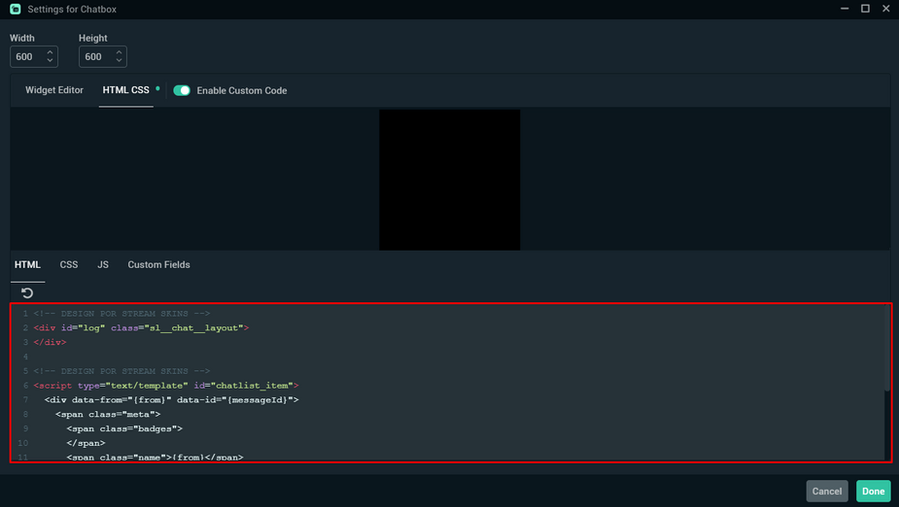
9. Now we will do the same thing for CSS, delete the original code and paste the code from the folder.
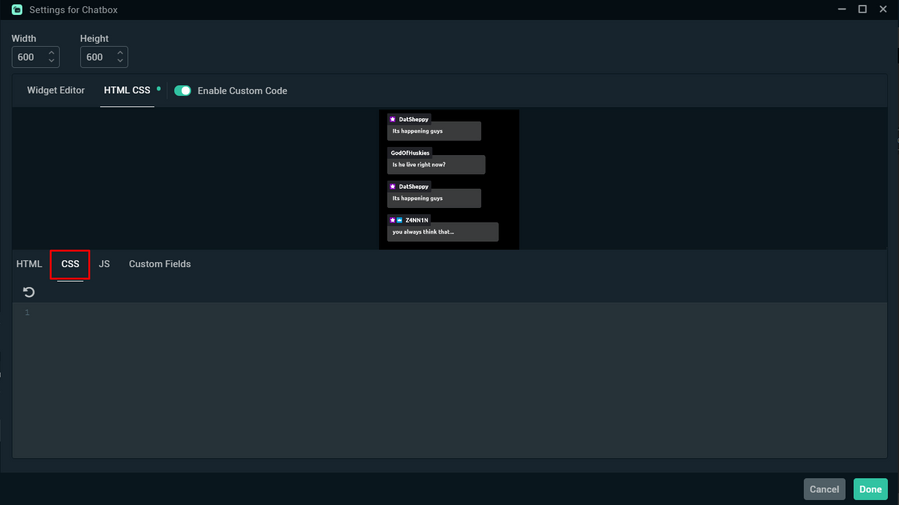


10. Click on Done.

11. After replacing the two codes the chat will be ready to use! Now you can modify the way you want, resize, adjust and place in any scene you want!

With these simple steps you will have already modified your chat, if you still have any questions, please contact us via chat or send a message.
If you have any questions on how to configure the rest of the Stream Pack see our full tutorial.
Thank you and happy streaming!

Learning how to stream on YouTube is a powerful first step toward building a successful and sustainable content creation career. While Twitch has long been

A webcam is more than just a camera; it’s your face and personality, the primary way you connect with your audience. Choosing the best streaming
Stream Skins is a Design Company focused on improving your stream.
Do you want to evolve your stream?
Premium Stream Overlays, Starting Soon, BRB, Stream Ending, Facecams, Transitions, Twitch Banners & Panels. Check out our Stream Shop.