
The step-by-step Vtuber Modeling Ultimate Guide
The world of VTubers is an exciting blend of technology, creativity, and online culture. Central to a VTuber’s identity is their virtual avatar, which represents
Configuring OBS can be a difficult task if you don’t know where and what to improve in your stream, in this tutorial we’ll go through the main tips to improve your live stream and configure OBS to achieve the best performance and quality.
First of all, it is important to know that one of the main elements of your stream is audio and it can cause you to lose the retention of your viewers on the stream.
Before changing OBS settings make sure that: you have a microphone with reasonable quality and a silent environment without an echo.
Keep the microphone close to your mouth and preferably with a structure to not receive vibrations from the environment.
If you don’t have a microphone or are considering buying one, we recommend the HyperX QuadCast, a cost-effective microphone that delivers superior quality at an affordable price.
Configuring audio in OBS for streaming is an important step in setting up your streaming software. Here are the steps to configure OBS audio for streaming:
First, we will eliminate the noise and hiss so that your voice comes out clean and with quality.
To add noise suppression in OBS select your microphone (Audio Input) and add a new filter, in this example, we will show the configuration of Streamlabs OBS:
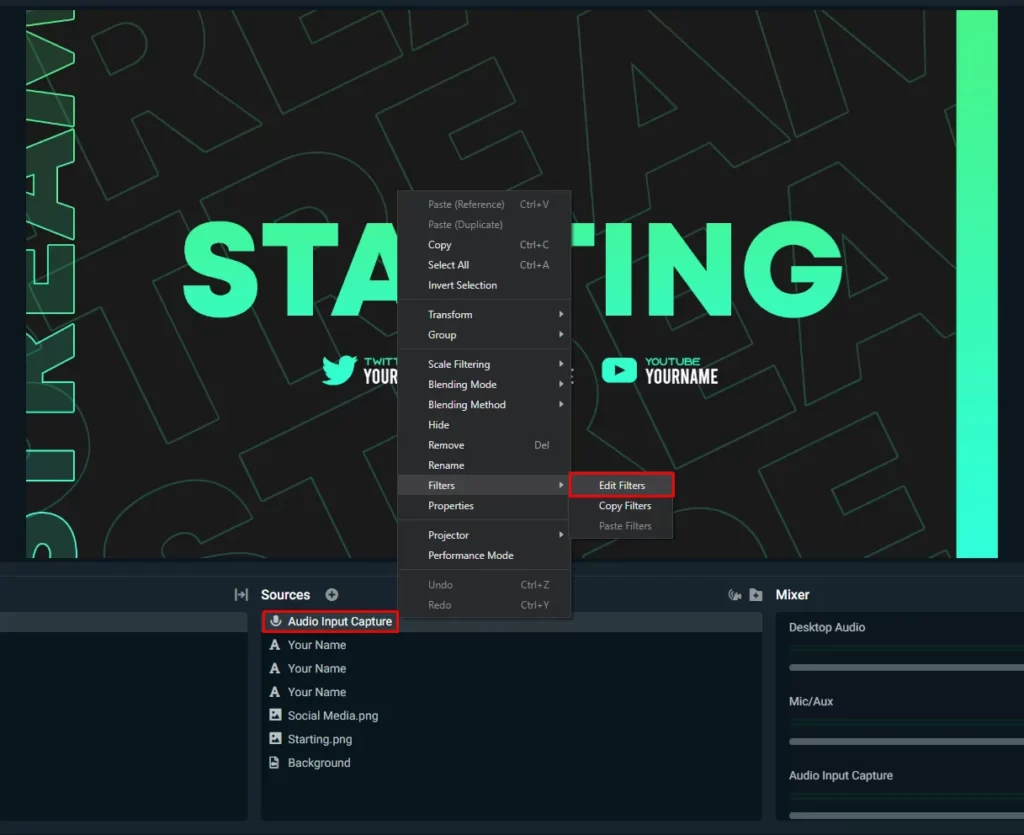
Select “add new filter” and “noise suppression”.
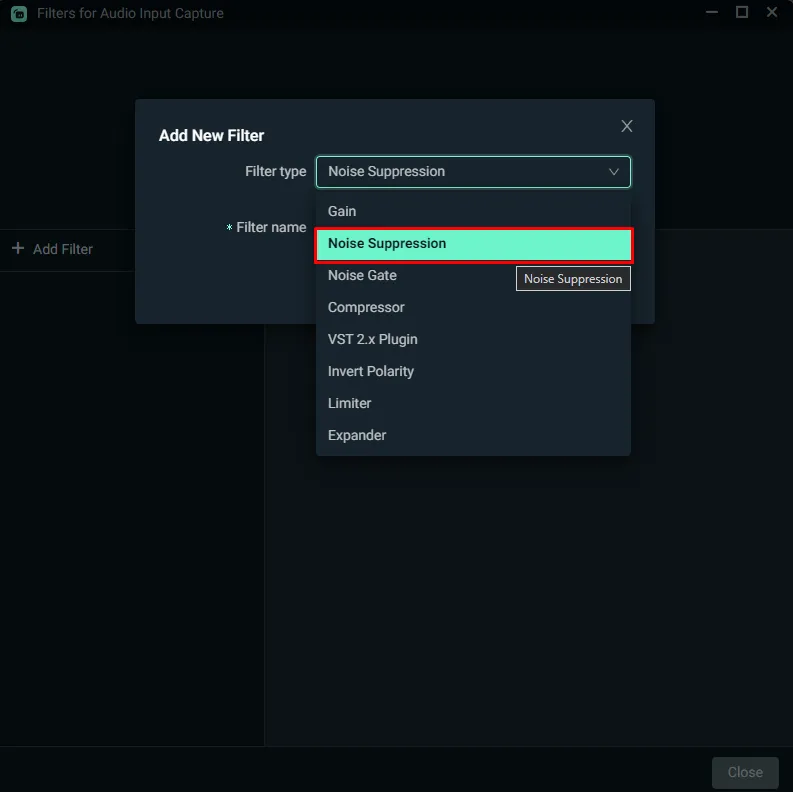
Choose between the two options “Speex” which has a lower quality but consumes less CPU or “RNNoise” which has a higher quality but uses more CPU (Not recommended for weak computers).
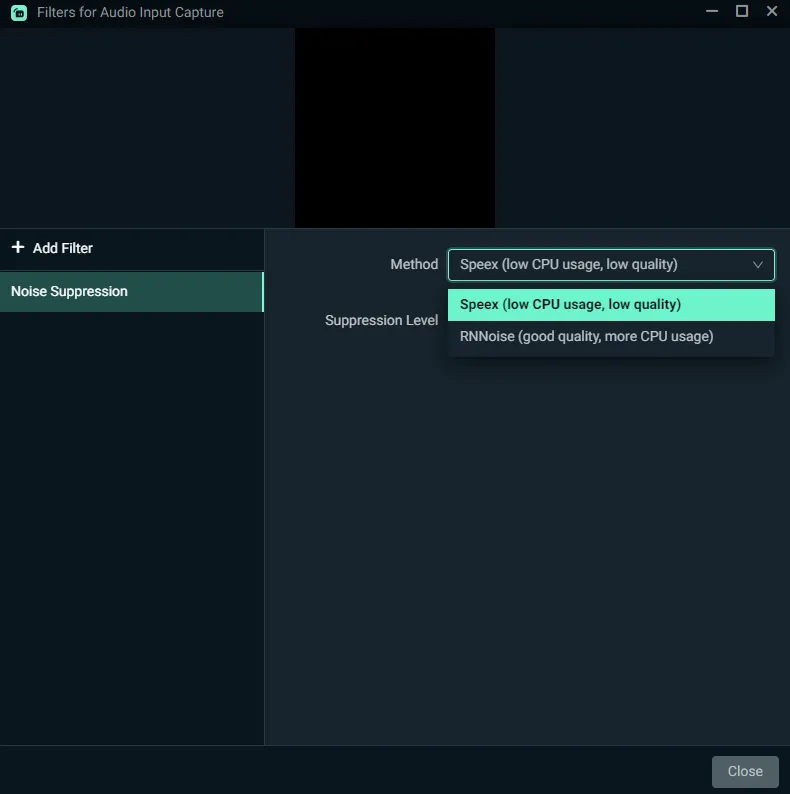
Test and see which option suits you best, you can also choose the suppression level starting at 0 dB and increasing the suppression level until all the noise is eliminated.
It is important to note that audio configuration can vary depending on your hardware and software setup. You may need to adjust your audio settings based on your specific setup to achieve optimal audio quality for your stream.
Additionally, it’s always a good idea to test your audio setup by recording or streaming a short test stream to ensure that everything is working properly.
We will leave a tutorial below in case you use OBS Studio and have not been able to follow any part:
Now that you have your audio properly configured, let’s move on to the video, to start configuring the video, let’s create a scene.
It’s important that you separate each scene with elements that will be used during the stream, such as the gaming scene, intermission scene and stream scenes starting or ending.
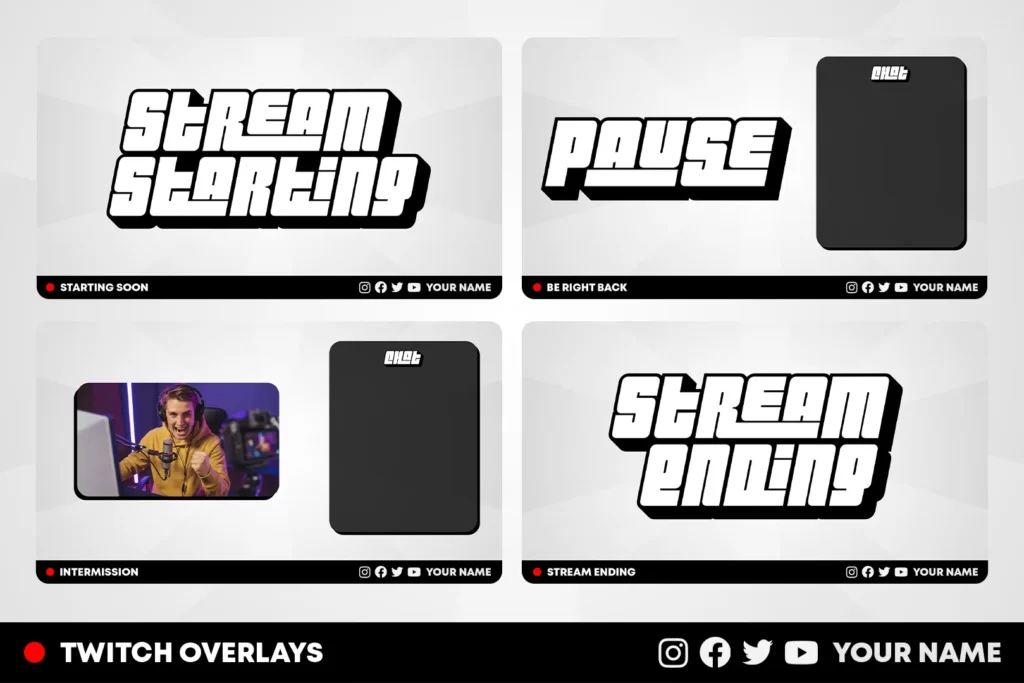
If you don’t already have scenes like Starting Soon, BRB, and Stream Ending we recommend you to check our stream shop there you can find the perfect stream package for your style with everything you need for your stream.
Having all this set up helps the stream to be fluid and with variations making your audience hooked on your content.
To configure your obs video for the best performance and quality start by selecting your video card in your encoder, this option may change depending on your video card.
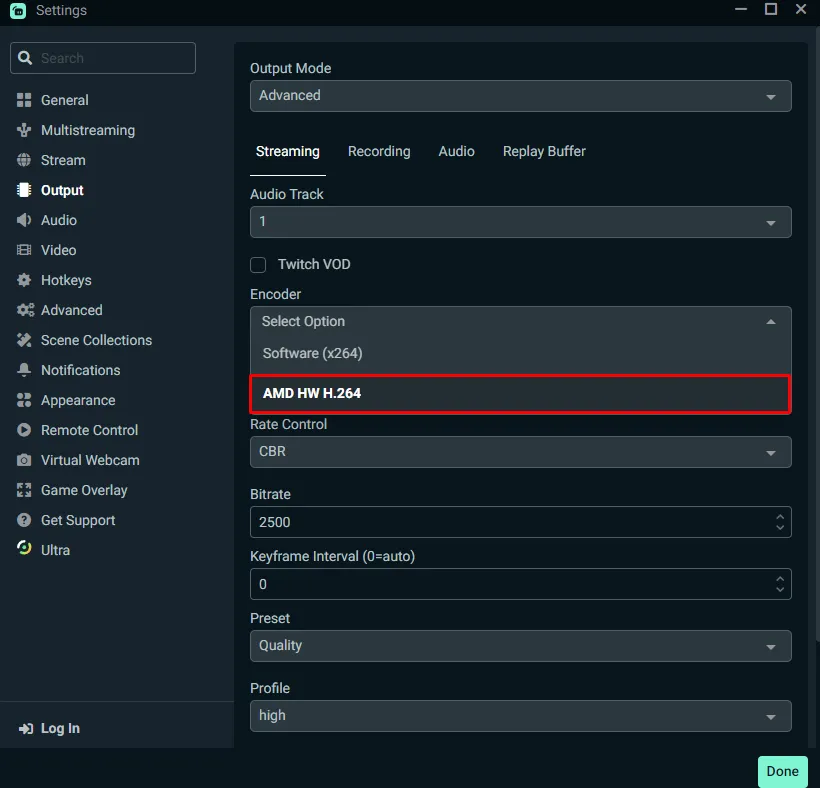
Choose the best encoding settings for your stream. This will depend on the bitrate, resolution, and frame rate you want to stream at. You can experiment with different settings to find what works best for you, but some general guidelines are:
To configure OBS for the best streaming results, you can follow these steps:
By following these steps, you should be able to configure OBS for the best streaming results. Remember to experiment with different settings and to test your stream regularly to ensure that everything is working as expected.

The world of VTubers is an exciting blend of technology, creativity, and online culture. Central to a VTuber’s identity is their virtual avatar, which represents

Looking for a free VTuber model that’s fully rigged, stylish, and stream-ready? You’ve found it. This professionally designed Live2D model is free for personal use
Stream Skins is a Design Company focused on improving your stream.
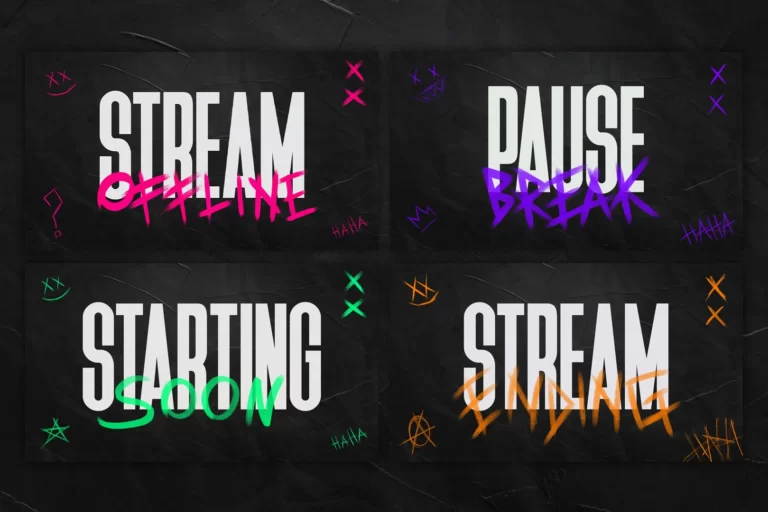
Do you want to evolve your stream?
Premium Stream Overlays, Starting Soon, BRB, Stream Ending, Facecams, Transitions, Twitch Banners & Panels. Check out our Stream Shop.