So, you’re ready to share your passion with the world and learn how to stream on Twitch with OBS. You’ve chosen the most powerful and popular broadcasting software available—OBS Studio. While its vast array of settings can seem intimidating at first, it offers complete control to create a truly professional broadcast. Think of it as your personal TV production studio, and this guide is your instruction manual.
We will walk you through every single step of the process, from the initial download to the exhilarating moment you click “Start Streaming.” We’ll demystify scenes and sources, explain the optimal settings for a smooth and high-quality broadcast, and give you the confidence to go live.
Before You Start: A Quick Checklist
To ensure a smooth setup process, let’s make sure you have the essentials ready.
A Capable PC: Streaming and gaming simultaneously is demanding. While you don’t need a supercomputer, a modern multi-core processor (CPU) and a dedicated graphics card (GPU) from the last few years are recommended.
A Stable Internet Connection: This is non-negotiable. A wired Ethernet connection is vastly superior to Wi-Fi. You need a stable upload speed of at least 6 Mbps for a quality 1080p stream.
A Microphone and Webcam: Clear audio is more important than video. A good USB microphone is a fantastic starting point. A simple 1080p webcam will work perfectly for video.
A Twitch Account: Make sure you have your account created and you can log in.
OBS Studio Installed: Download the latest version of OBS Studio for free from the official website: https://obsproject.com/. Install it before proceeding to the next step.
How to Stream on Twitch with OBS: The Complete Guide 7
Phase 1: The First-Time Setup & Connecting to Twitch
With OBS Studio installed, it’s time to fire it up and connect it to your Twitch channel. OBS has made this process incredibly simple for new users.
Step 1: Run the Auto-Configuration Wizard
When you open OBS for the first time, you’ll be greeted by the Auto-Configuration Wizard. Do not skip this! It’s an invaluable tool that will scan your hardware and internet speed to recommend baseline settings.
When prompted, select “Optimize for streaming, recording is secondary.”
Follow the on-screen steps, allowing it to select your resolution and test your bandwidth.
These settings will give you a solid, stable starting point. We will fine-tune them later, but this step prevents many common beginner issues.
Step 2: Connecting Your Twitch Account (The Easy Way)
In the past, you needed to manually copy and paste a “stream key.” While that’s still an option, the modern, integrated method is far superior.
In OBS, go to File > Settings.
Navigate to the “Stream” tab on the left.
For “Service,” select “Twitch.”
Click the “Connect Account (recommended)” button.
A browser window will pop up asking you to log in to your Twitch account and authorize OBS.
Connecting your account this way automatically authenticates your stream and adds helpful Twitch “Docks” to your OBS interface. These docks let you see your stream chat and activity feed directly within OBS, so you don’t have to keep a separate browser window open.
Screenshot of the OBS “Stream” settings tab, with the “Connect Account (recommended)” button clearly highlighted
Step 3: Understanding the OBS Interface
The main OBS window can look complex, but it’s organized into five simple sections. Understanding what they do is key.
Scenes (Bottom Left): Think of these as different layouts for your stream. You’ll have a scene for gameplay, a “Be Right Back” scene, a “Starting Soon” scene, etc.
Sources (Next to Scenes): These are the individual elements inside a Scene. Your game, your webcam, your microphone, and your overlay graphics are all sources.
Audio Mixer (Bottom Center): This is where you control the volume levels for all your audio sources, like your mic and game audio.
Scene Transitions (Next to Audio Mixer): This controls the animation when you switch between your scenes (e.g., a simple fade or a custom stinger transition).
Controls (Bottom Right): This is where you’ll find the most important buttons: “Start Streaming,” “Start Recording,” and “Settings.”
Phase 2: Building Your First Scenes
This is the creative part where you design what your viewers will actually see. We’ll build a basic three-scene setup that every streamer needs.
Step 4: Setting Up Your Main “Gameplay” Scene
Your “Gameplay” or “Live” scene is where you’ll spend most of your time. By default, you have one scene to start with. Let’s add the essential sources.
Click the “+” button under the “Sources” dock to add each of the following:
Game Capture: This is the best way to capture your game. Select it, name it (e.g., “Valorant”), and in the properties, choose “Capture specific window” and select your game’s executable. If Game Capture doesn’t work for some reason, you can try “Window Capture” as a backup. “Display Capture” should be your last resort as it captures your entire monitor.
Video Capture Device (Webcam): Select this to add your webcam. Name it, then choose your device from the dropdown. You can click and drag the corners of the red box in the preview window to resize and position your webcam.
Audio Input Capture (Microphone): Select this to add your dedicated microphone. Name it, and choose the correct device. You’ll see its audio level appear in the Audio Mixer.
example of a stream with a full, professional overlay pack in action, showing the webcam frame, animated alerts, and event labels
Step 5: Adding a Professional Stream Overlay
A plain gameplay and webcam feed is functional, but a custom overlay makes it look professional. An overlay is a set of graphics that frame your content. For a deep dive, see our guide on what is included in a stream overlay.
Under “Sources,” click the “+” and select “Image.”
Name it something like “Webcam Frame.”
Click “Browse” and locate the webcam frame file (it should be a .PNG with a transparent background).
Position and resize the frame so it fits perfectly around your webcam source. You may need to adjust the layer order by clicking the up/down arrows in the Sources dock to ensure the frame is on top of the webcam.
Repeat this process for any other overlay graphics.
A full overlay pack will transform your broadcast. Learning how to set up an stream pack on OBS is a key step to elevate your production value and create a broadcast that truly stands out.
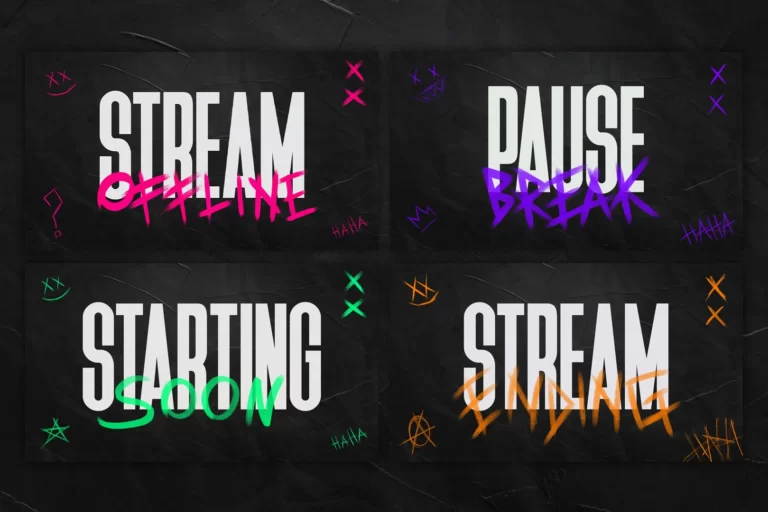
Step 6: Creating Essential Utility Scenes
You need scenes for when you aren’t actively playing. Let’s create a “Starting Soon” scene.
Under the “Scenes” dock, click the “+” button to create a new scene. Name it “Starting Soon.”
With this new, empty scene selected, go to the “Sources” dock and click “+.”
Select “Media Source” (for an animated background) or “Image” (for a static one).
Browse for your “Starting Soon” video or image file. It should be 1920×1080 to fill the screen.
You can also add a “Text (GDI+)” source to add a custom message.
Repeat this process to create a “Be Right Back” and a “Stream Ending” scene.
A screenshot of a complete OBS “Gameplay” scene, with arrows pointing to the different sources (Game Capture, Webcam, Overlay) in the Sources dock
Phase 3: Optimizing Your Stream Settings for Quality
Now we dive back into the settings to fine-tune the recommendations from the Auto-Configuration Wizard. This is crucial for achieving a stable, high-quality stream. Go to File > Settings.
Step 7: Configuring Your Video Settings
Navigate to the “Video” tab.
Base (Canvas) Resolution: This must match your monitor’s resolution and your overlay’s design size. For almost everyone, this should be 1920×1080.
Output (Scaled) Resolution: This is the resolution you actually send to Twitch.
For a powerful PC and fast internet, you can keep this at 1920×1080.
For a mid-range PC or if you experience lag, changing this to 1280×720 is a great way to improve performance without a huge quality loss.
Downscale Filter: If your Output resolution is lower than your Base, this setting matters. Use “Lanczos (Sharpened scaling, 36 samples)” for the best quality.
Common FPS Values: Set this to 60 for smooth gameplay streams. If your PC struggles, 30 is an acceptable alternative.
Step 8: Dialing in Your Output (Streaming) Settings
Navigate to the “Output” tab and set the “Output Mode” at the top to “Advanced.”
Encoder: This is the most important setting.
NVIDIA NVENC H.264 (new): If you have an NVIDIA graphics card (GTX 16-series or newer), choose this. It uses a dedicated chip on your GPU and has minimal impact on game performance.
AMD VCE/VCN H.264: If you have a modern AMD graphics card, choose this option.
x264: If you have neither, or have a very powerful CPU, this option uses your processor. It’s more resource-intensive.
Rate Control: Always set this to CBR (Constant Bitrate). This is required by Twitch to ensure a stable stream.
Bitrate: This determines the quality of your stream. It depends on your upload speed and output resolution. Do not set this higher than 80% of your stable upload speed.
1080p 60fps: 6000 Kbps
1080p 30fps: 4500 Kbps
720p 60fps: 4500 Kbps
720p 30fps: 3000 Kbps
Keyframe Interval: Set this to 2.
Preset: This controls the quality vs. performance trade-off. For NVENC, start with “Quality.” For x264, start with “veryfast.” If your stream lags, you can move this to a faster/lower quality setting (e.g., “Performance” or “ultrafast”).
A table graphic showing Twitch’s recommended bitrate settings for different resolutions, such as 1080p 60fps corresponding to 6000 Kbps
Phase 4: Setting Up Your Audio & Going Live!
You’re almost there! Let’s get your audio sounding clean and professional.
Step 9: Configuring Your Audio
Look at the Audio Mixer dock. You should see bars moving for your microphone and your “Desktop Audio.”
Adjust Levels: Speak into your mic at a normal volume. The bar should be hitting the yellow section, but not the red. Adjust the slider accordingly. Play your game and adjust the “Desktop Audio” slider so it’s significantly lower than your mic. Your voice must always be the clearest thing on stream.
Add Basic Filters: Click the three dots next to your microphone’s settings in the mixer and select “Filters.” Add these two essential filters by clicking the “+”:
Noise Suppression: Use the “RNNoise (good quality, more CPU usage)” method. This will magically remove background noise like fans or keyboard clicks.
Limiter: This prevents your audio from distorting if you laugh or shout loudly. Set the “Threshold” to around -6 dB.
Step 10: The Final Pre-Flight Check & Going Live
Everything in OBS is now set. The final step is to prepare your stream information on Twitch.
In OBS, go to Docks > Twitch Stats. This will show your viewer count and uptime.
Go to Docks > Twitch Activity Feed to see follows and subs.
Go to Docks > Twitch Chat to see your chat. Arrange these windows where you like.
To set your stream title and category, you can either open your Creator Dashboard on the Twitch website or, if you connected your account, use the “Stream Information” dock that should have appeared.
Set a compelling stream title, a go-live notification, and select the correct game category.
Take a deep breath. In OBS, click the “Start Streaming” button.
Congratulations! You are now live on Twitch with a professional setup.
stream overlay well configured webcam border
Frequently Asked Questions
Why is my stream lagging or dropping frames in OBS? This is usually caused by settings that are too demanding for your PC. The most common fixes are: lowering your Output (Scaled) Resolution from 1080p to 720p, lowering your FPS from 60 to 30, or choosing a faster encoder preset (e.g., moving from “Quality” to “Performance”).
What is a stream key and do I still need it? A stream key is a unique code that tells your software where to send your video feed. By using the “Connect Account” method, you don’t need to handle the stream key manually. If for some reason you can’t connect your account, you can find your key in your Twitch Creator Dashboard and paste it into the “Stream Key” field in OBS.
How do I add follower alerts and other notifications? Alerts are typically handled by third-party services like Streamlabs or StreamElements. You would set up your alerts on their website, which will give you a “browser source” URL. In OBS, you add a “Browser” source, paste in the URL, and the alerts will appear on your stream when triggered.
Can I stream and play games from a single PC? Yes, absolutely. Most streamers start with a single PC setup. Using a hardware encoder like NVIDIA NVENC is highly recommended for single PC streaming as it minimizes the performance impact on your game.
My webcam looks dark or the colors are off in OBS. How do I fix it? In the “Sources” dock, double-click your “Video Capture Device” to open its properties. Click the “Configure Video” button. This will open your webcam’s driver settings, where you can adjust brightness, contrast, saturation, and white balance to get the perfect picture.
How do I save my scenes and settings? OBS saves your settings automatically. You can also back them up by going to Profile > Export to save your Scene Collection and Profile settings to a file. This is great for moving your setup to a new computer.
Conclusion
You’ve now learned the complete process of how to stream on Twitch with OBS. You’ve configured your software, connected your account, built your core scenes, optimized your settings for quality, and clicked that “Start Streaming” button. This technical setup is the foundation of your streaming journey.
Remember, a perfect setup is just the beginning. The next step is to build your channel through consistency, community engagement, and creating great content.
Your next steps are to:
Practice switching between your scenes until it feels natural.
Start creating a consistent schedule for your streams.
Explore our complete guide on how to become a successful streamer to learn about growth strategies, and browse our shop for professional assets to make your new stream look incredible.
Learning how to stream on YouTube is a powerful first step toward building a successful and sustainable content creation career. While Twitch has long been